Part 1 — Get started
Create your owner account
First you need a personal login. This is separate from your restaurant — one account can own one or more venues later.
- Open the sign-up page and enter your email and a password (at least 6 characters).
- Click Create account.
- If email confirmation is turned on for your site, check your inbox and confirm before signing in.
Go to Create your owner account →

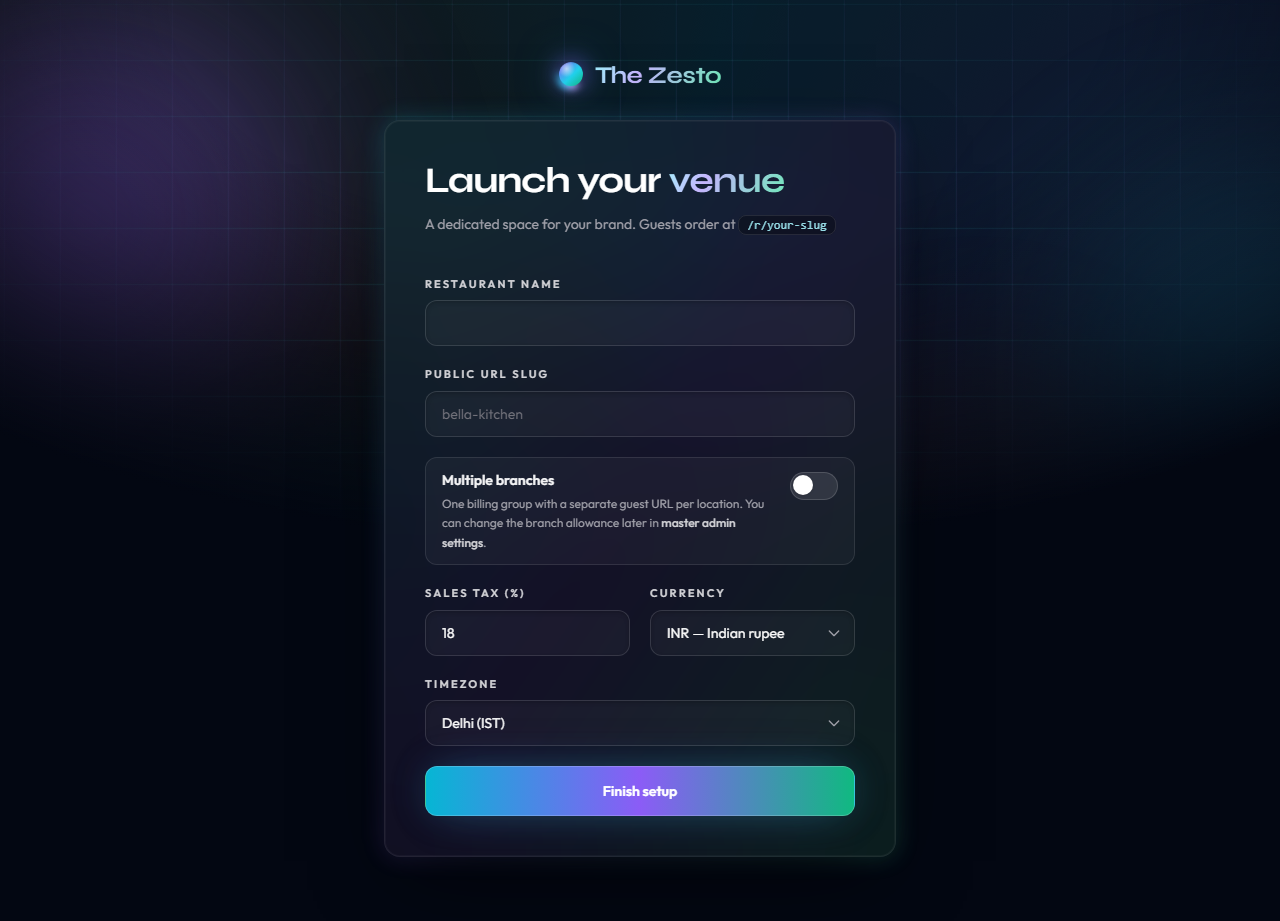
Set up your restaurant
After sign-up you land on a short setup form. This creates your venue in the system — name, public web address, tax, currency, and timezone.
- Enter your restaurant name (guests see this on menus and receipts).
- Choose a public web address — for example my-cafe becomes /r/my-cafe on guest links.
- Set your sales tax percentage, currency, and timezone.
- Optionally turn on Multiple branches if you plan to add more locations under one billing account.
- Click Finish setup — you will arrive at your dashboard.
Go to Set up your restaurant →
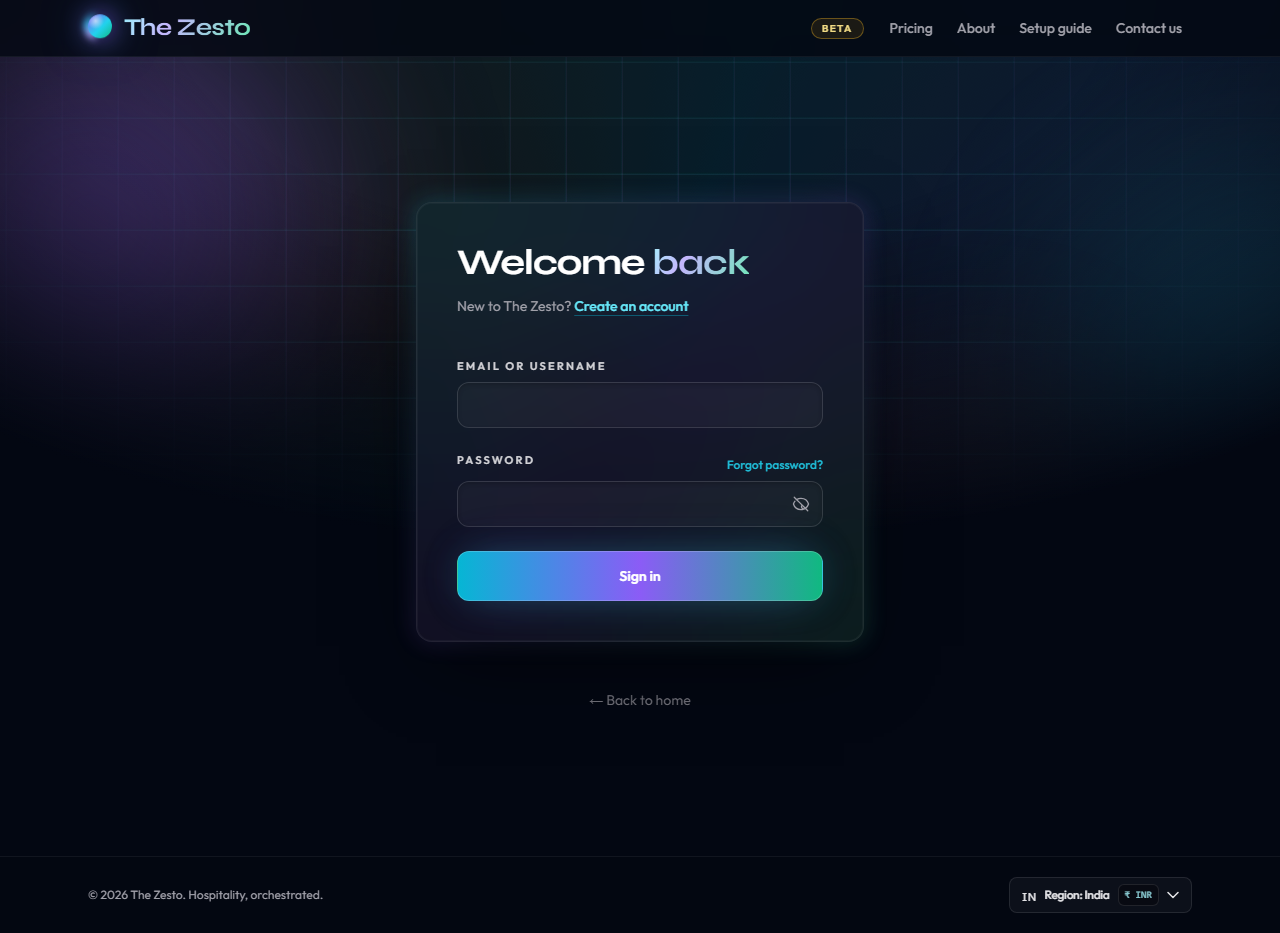
Sign in and open your dashboard
When you return later, sign in with the same email and password. You land on Overview — your home screen inside the owner dashboard.
- Go to the login page and enter your email and password.
- Click Sign in.
- You arrive at Overview, which shows today’s orders and revenue at a glance.
Open Sign in and open your dashboard in dashboard →
Part 2 — Your dashboard tabs
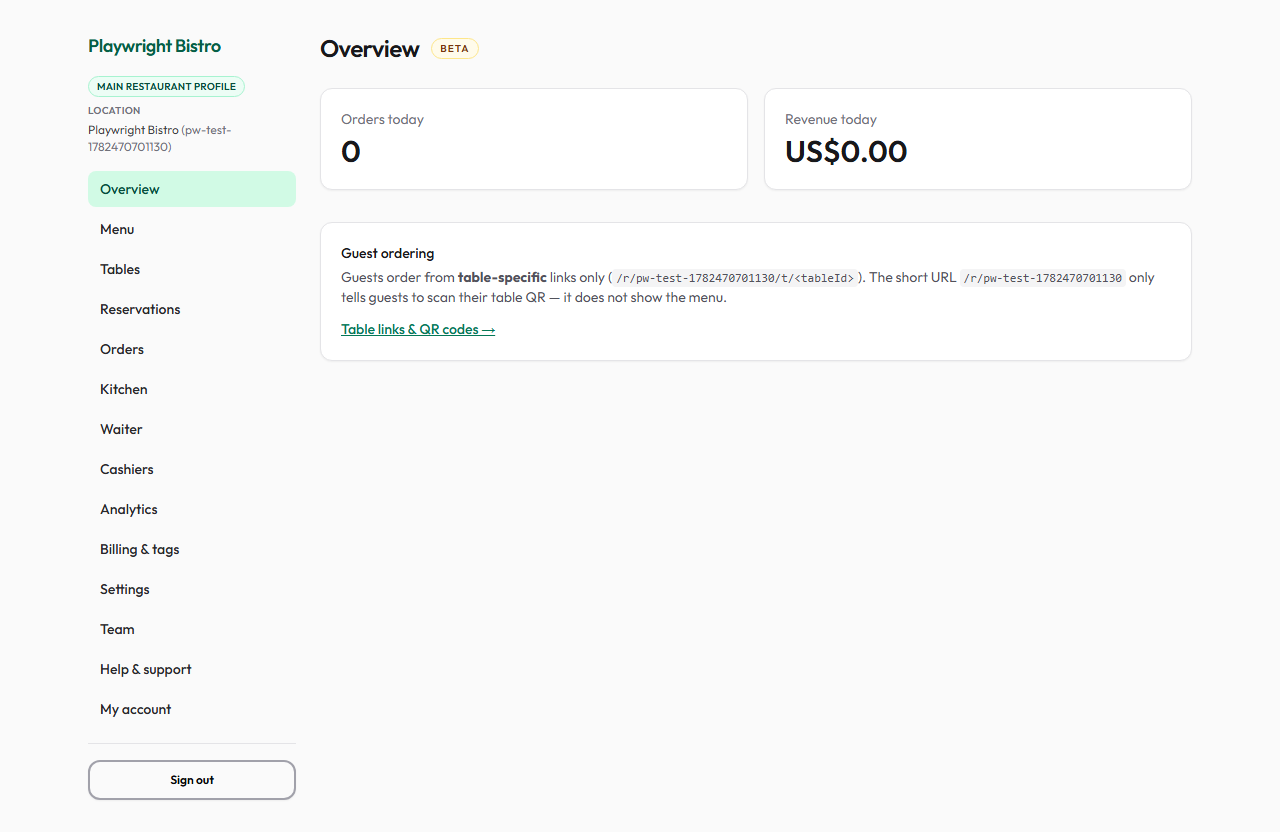
Overview
Your starting point each day. See how many orders came in today and how much revenue they generated.
- Check Orders today and Revenue today after service starts.
- Use the link to Tables when you need QR codes or table links.
- If you have multiple locations, switch between them from the sidebar header.
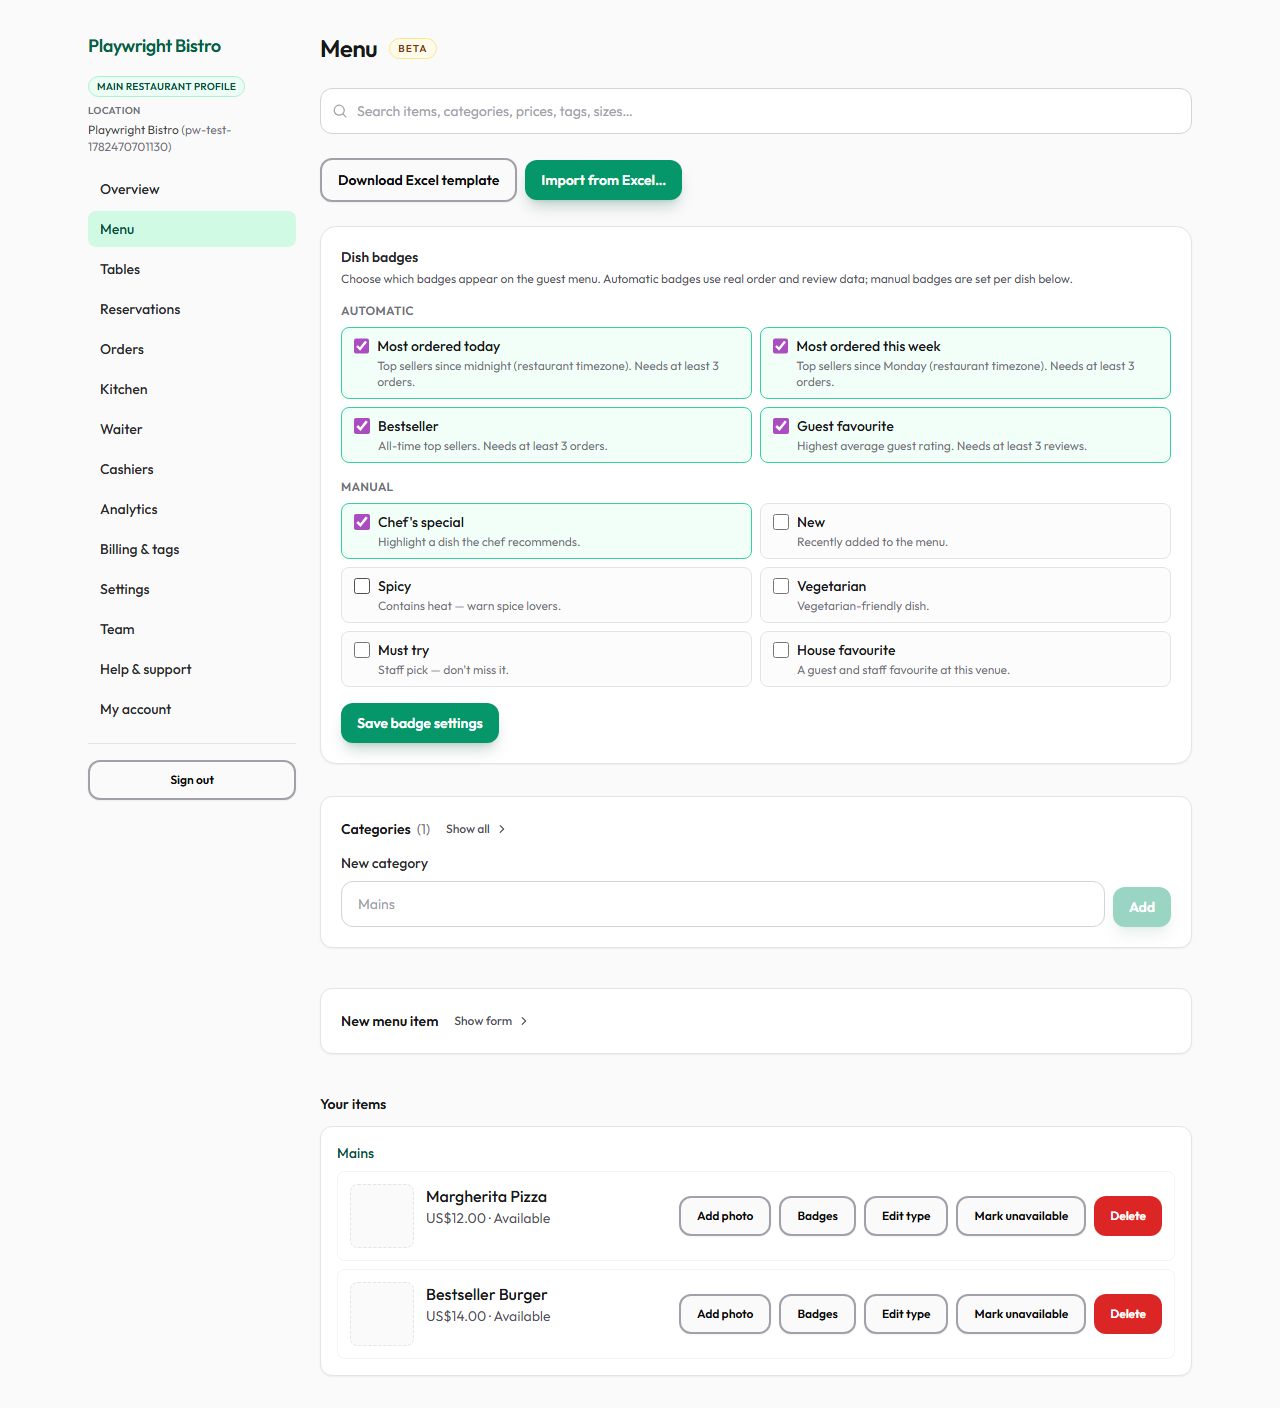
Menu
Build what guests see and order — categories (Starters, Mains, Drinks) and individual dishes with prices, photos, and tags.
- Add a category, then add items inside it with name, price, and description.
- Upload a photo for an item; you can crop it before it goes live.
- Turn availability off to hide an item without deleting it.
- Use Import to bulk-load many items from a spreadsheet.
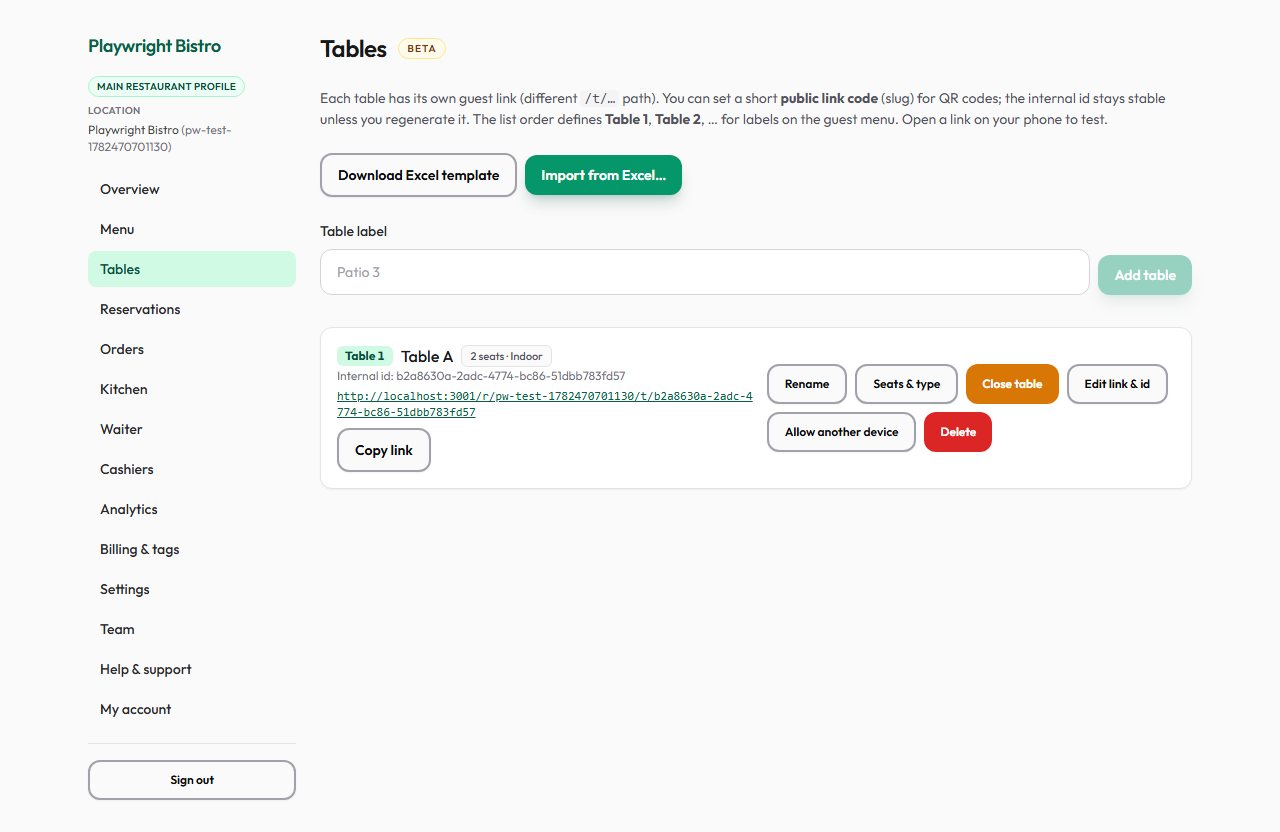
Tables
Each dining table gets its own link and QR code. Guests must open the table-specific link to order (not just the restaurant homepage).
- Click Add table for each physical table in your venue.
- Copy or print the QR code / link for each table and place it on the table.
- Rename tables for your staff (Table 1, Patio 3, etc.).
- Use Close table when guests leave — this clears the shared cart for the next party.
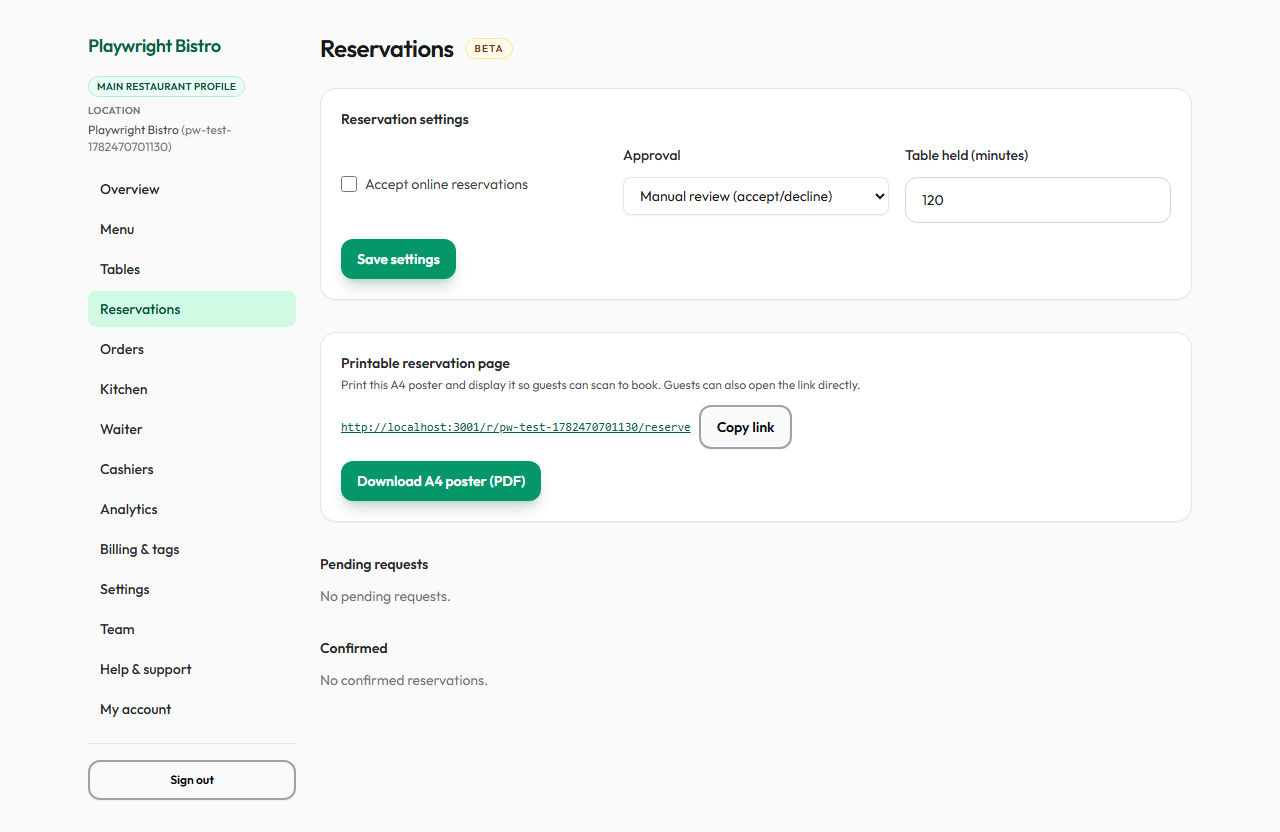
Reservations
See and manage table bookings if you accept reservations. Guests book through your public reservation flow.
- Open Reservations to see upcoming bookings by date and time.
- Confirm, seat, or cancel reservations as your service runs.
- Turn reservation features on or off in Settings if you do not take bookings.
Open Reservations in dashboard →
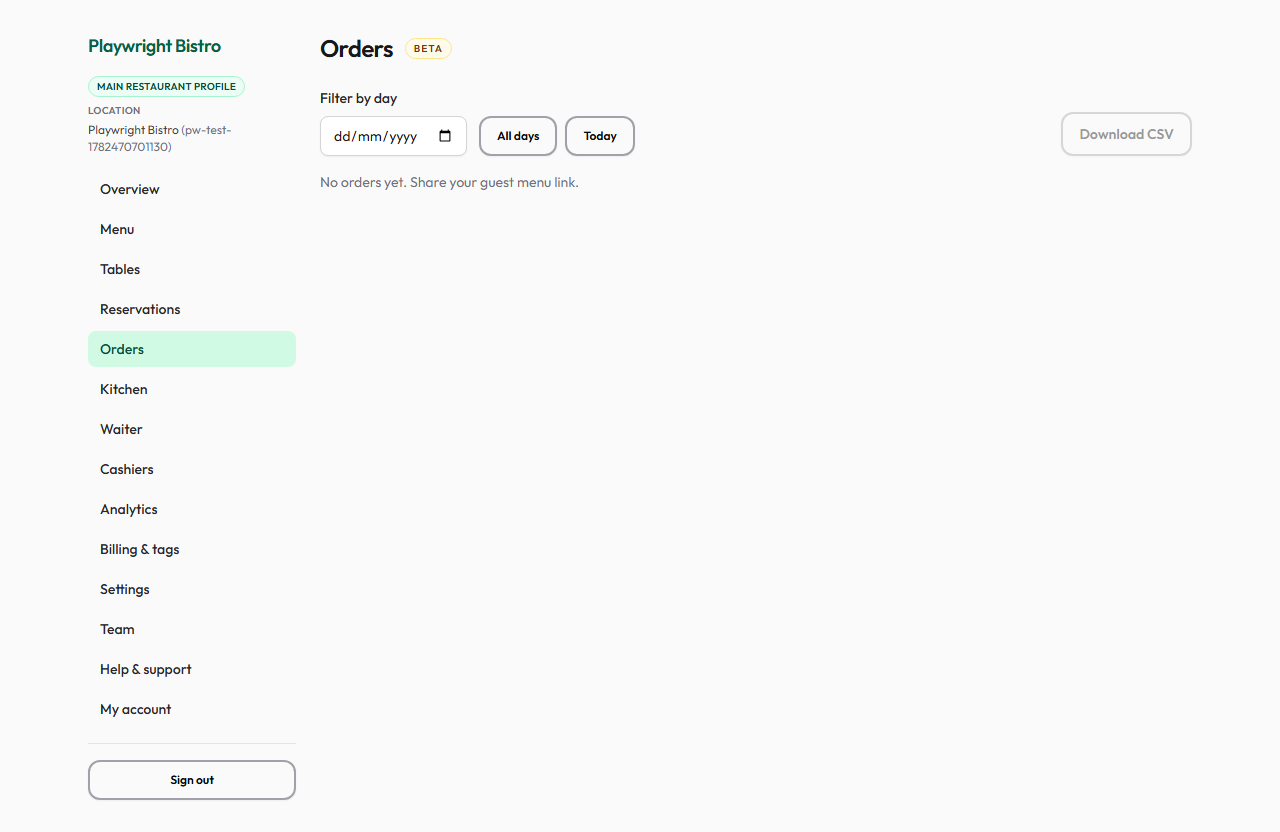
Orders
Every guest order appears here in real time. Track status from new → accepted → ready → served.
- Watch new orders arrive during service.
- Update status as your team progresses each order.
- Filter or search when the list gets busy.
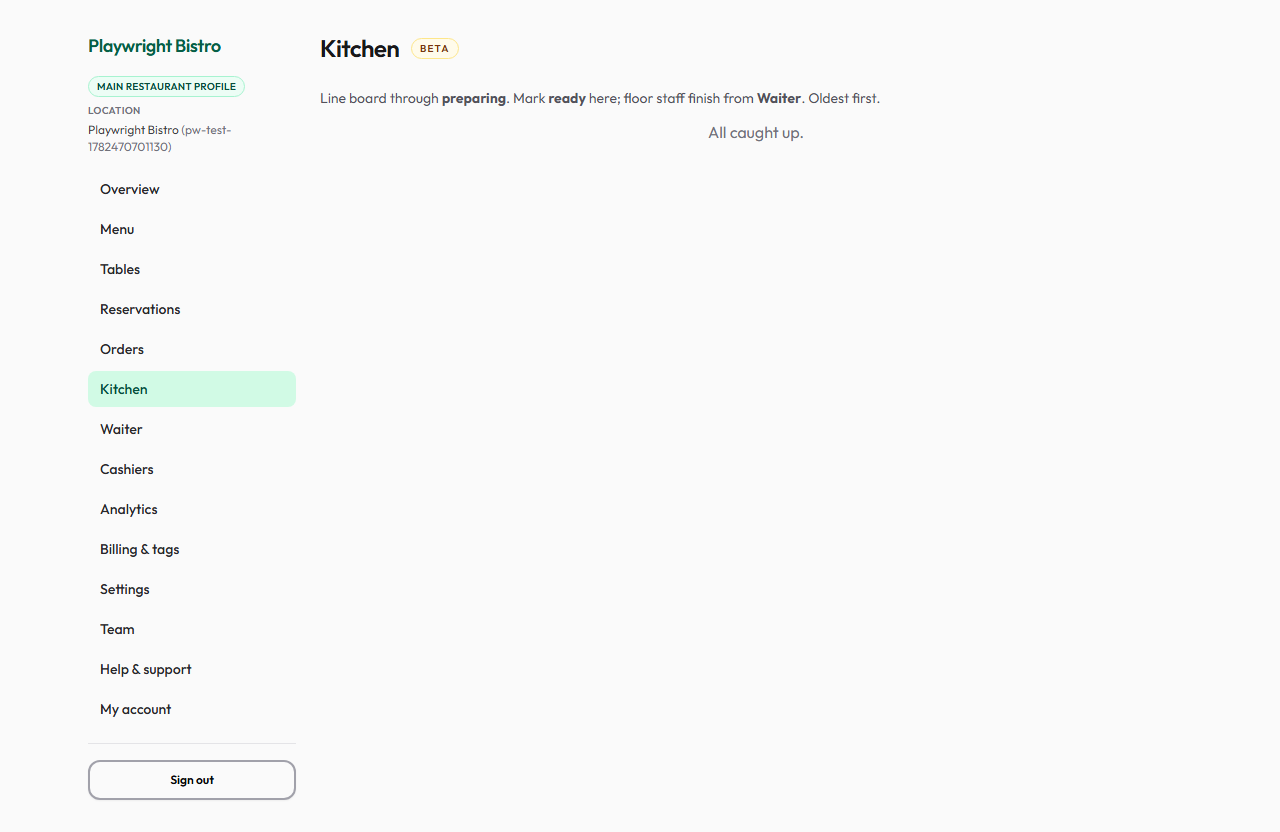
Kitchen
A board view for the kitchen line — grouped by order so cooks can mark items ready without touching the full orders list.
- Open Kitchen on a tablet in the kitchen.
- Mark individual items or whole orders as ready when prepared.
- Statuses sync back to Orders and the guest’s phone automatically.
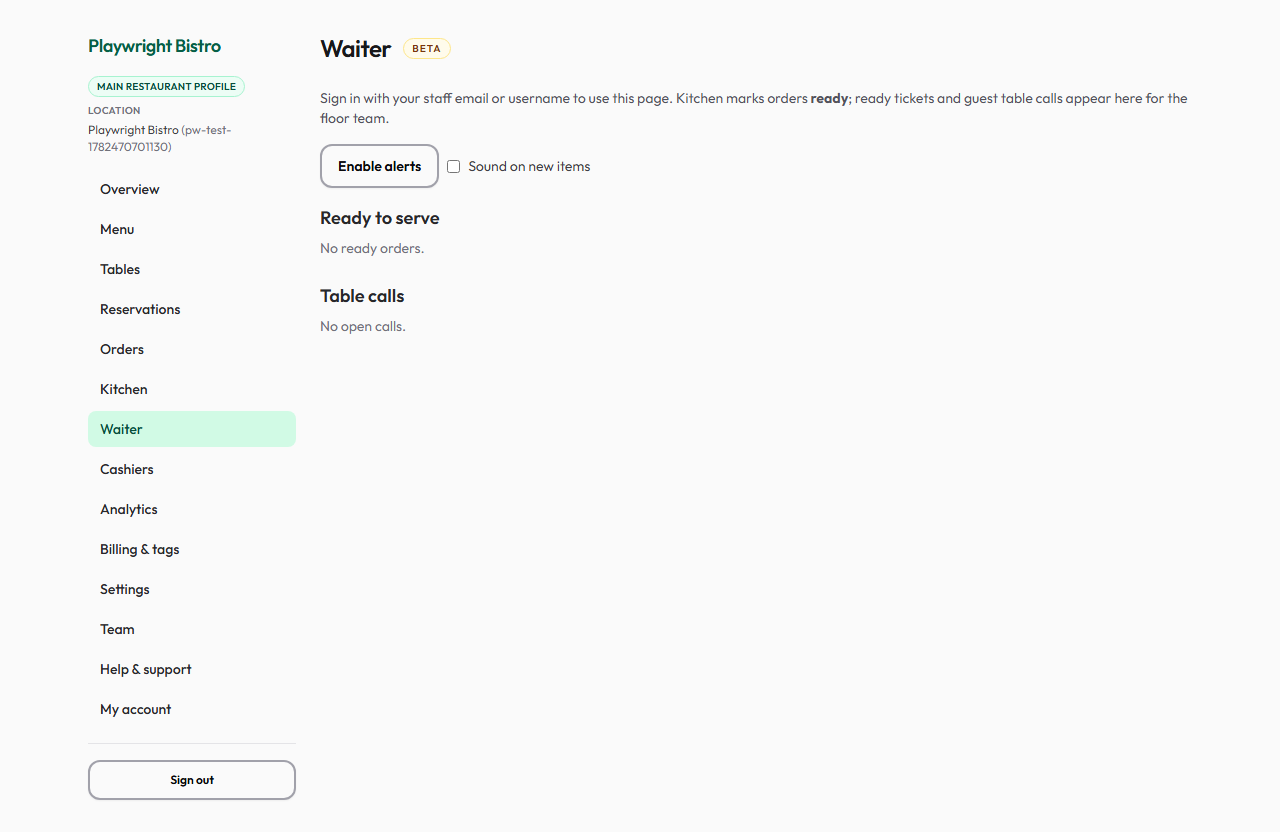
Waiter
Floor staff use this view on a trusted device. See tables, active orders, and guest requests to call a waiter.
- Open Waiter on a staff phone or tablet.
- Trust the device once (owner or manager approves) so it stays signed in.
- Respond to table calls and check order status while moving on the floor.
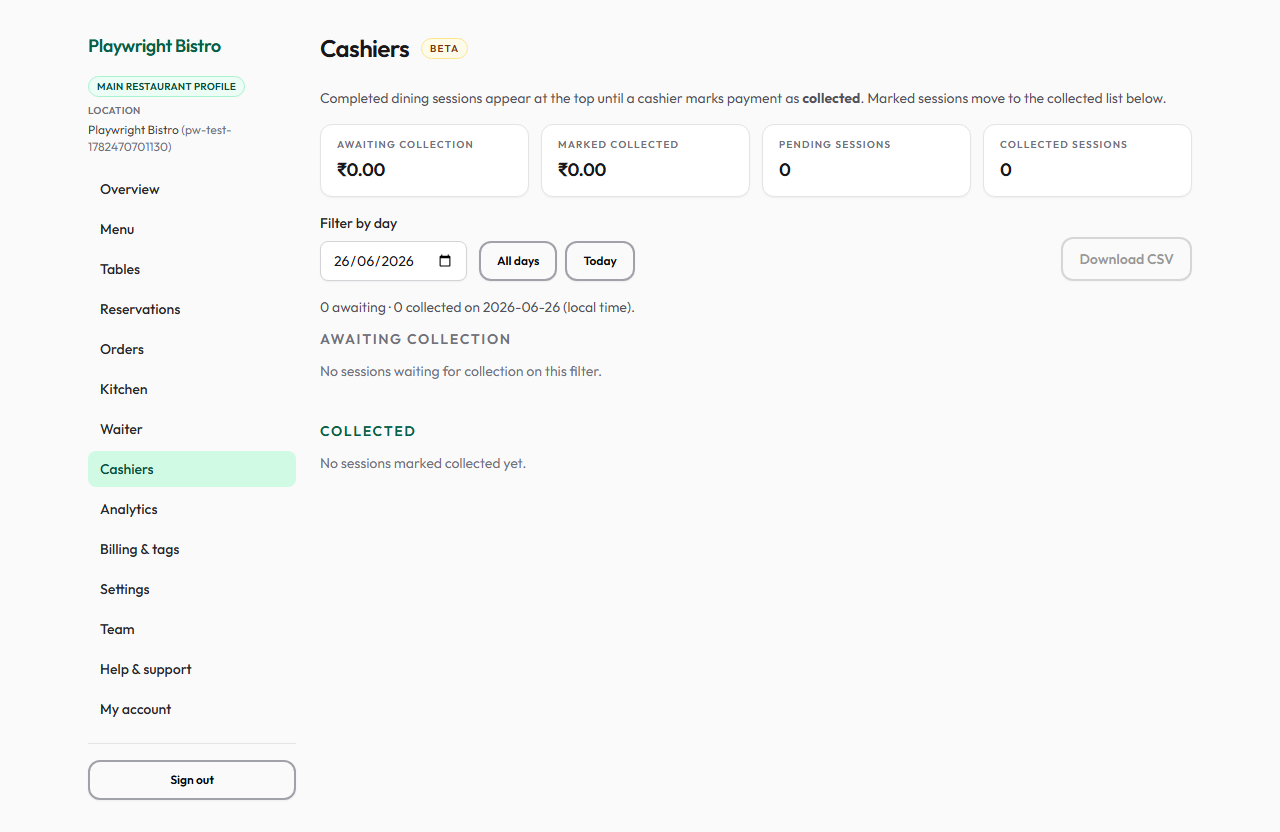
Cashiers
End-of-service collections — see open table bills and record when payment is collected at the counter.
- Open Cashiers during closing or shift handover.
- Review tables with open balances.
- Mark collections when payment is taken.
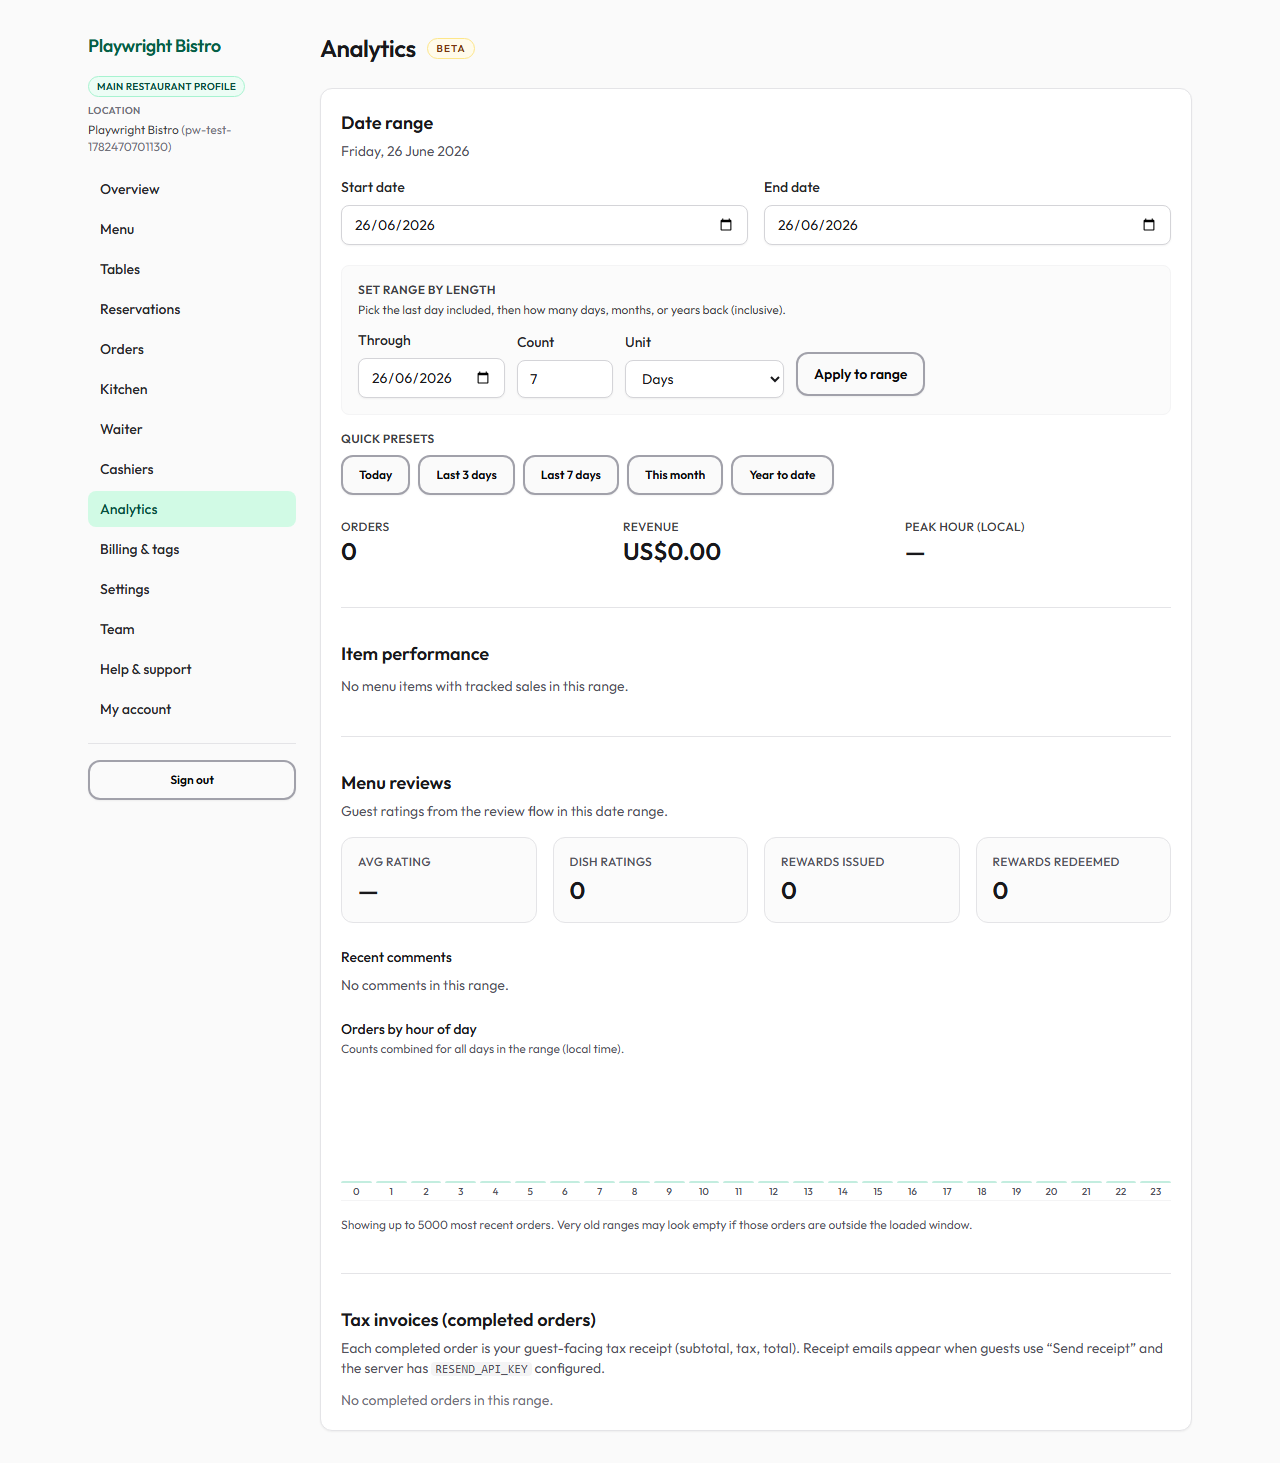
Analytics
Reports and trends — revenue over time, popular dishes, and operational snapshots to understand how service is going.
- Pick a date range to explore performance.
- Review top items and order volumes.
- Share insights with your team during planning.
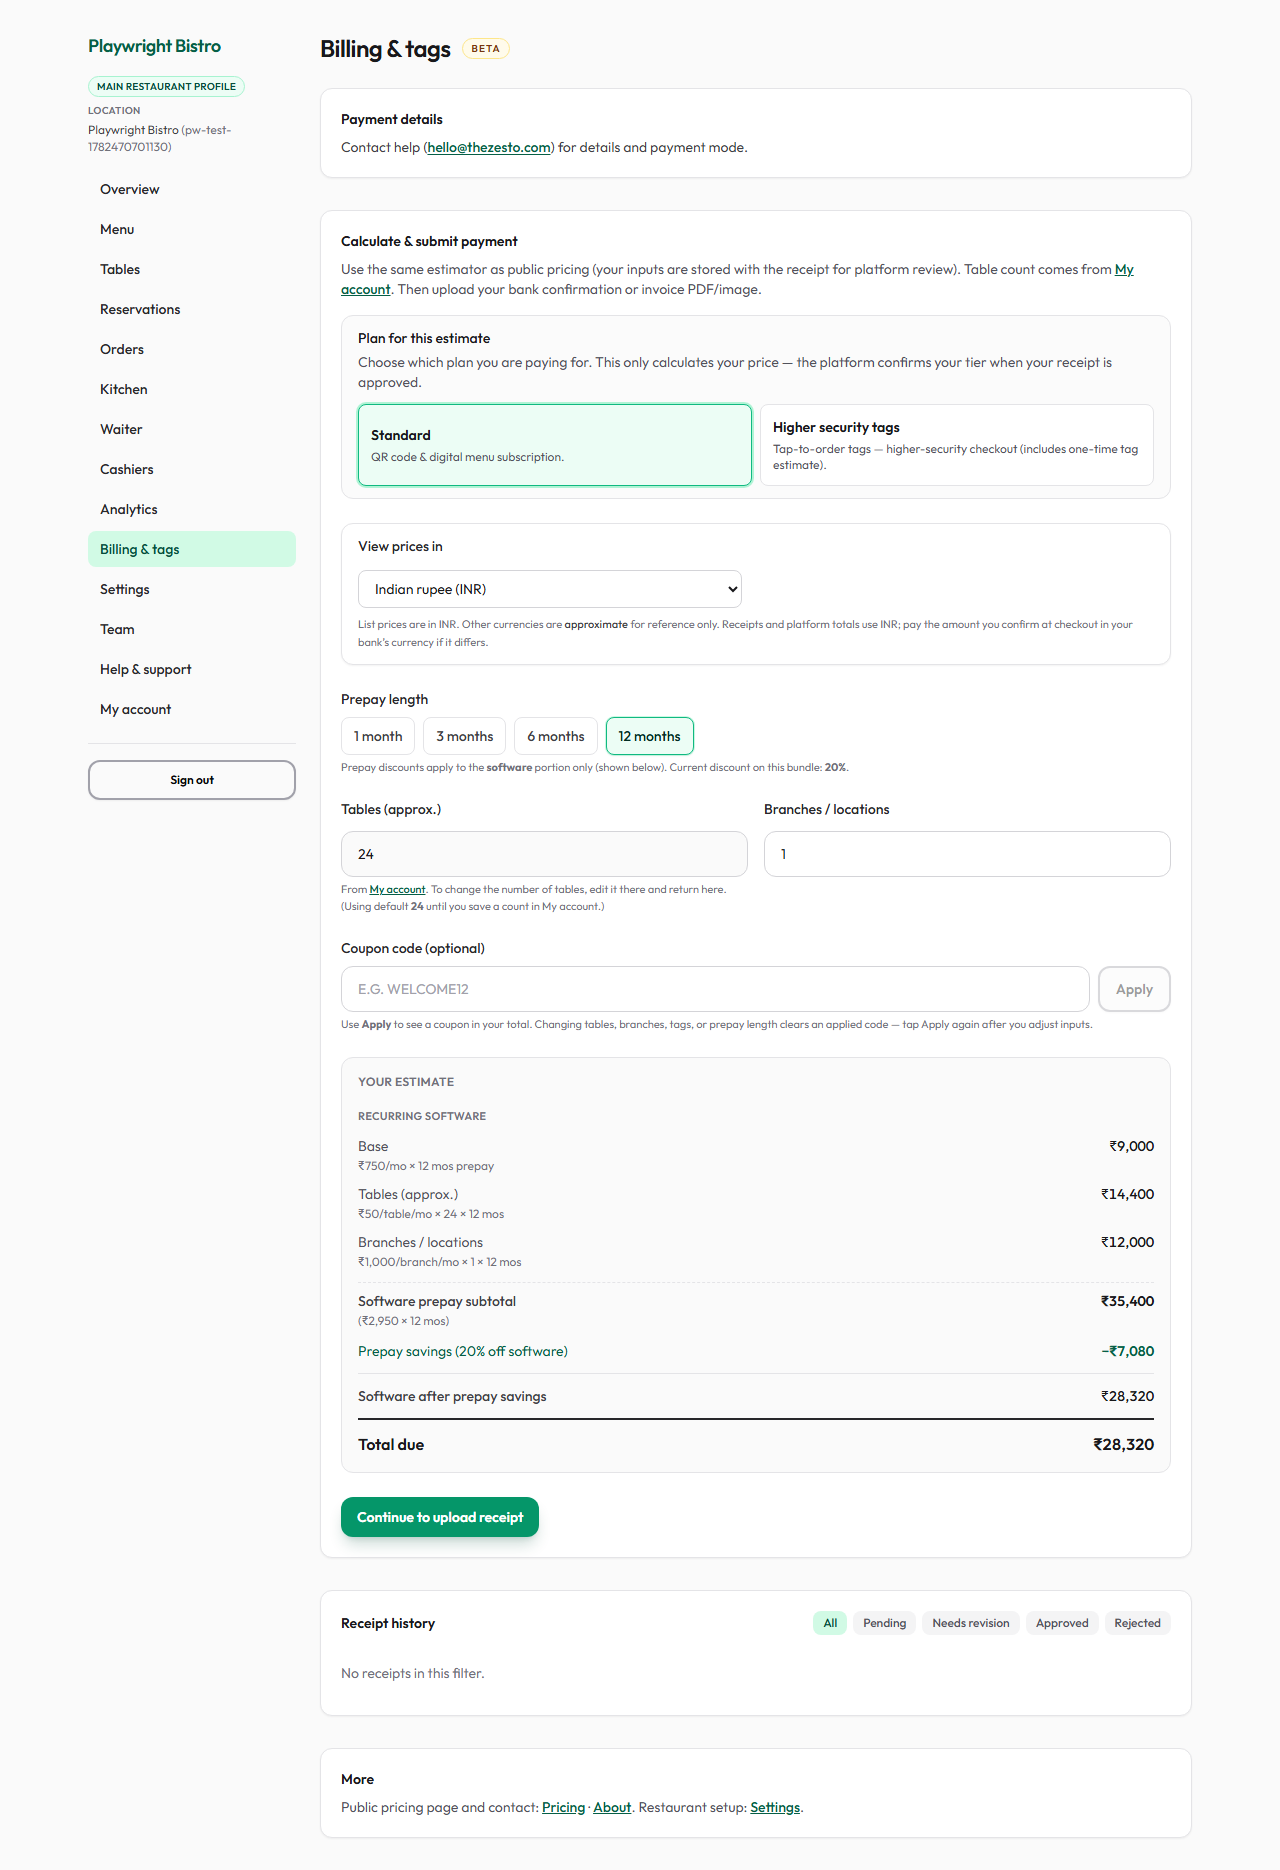
Billing & tags
Manage your subscription with The Zesto and set up TapKey NFC tags if you use tap-to-open menus.
- See your current plan and paid-through date.
- Upload a payment receipt when renewing your subscription.
- Configure TapKey batches and programming if you use physical tap stands.
Open Billing & tags in dashboard →
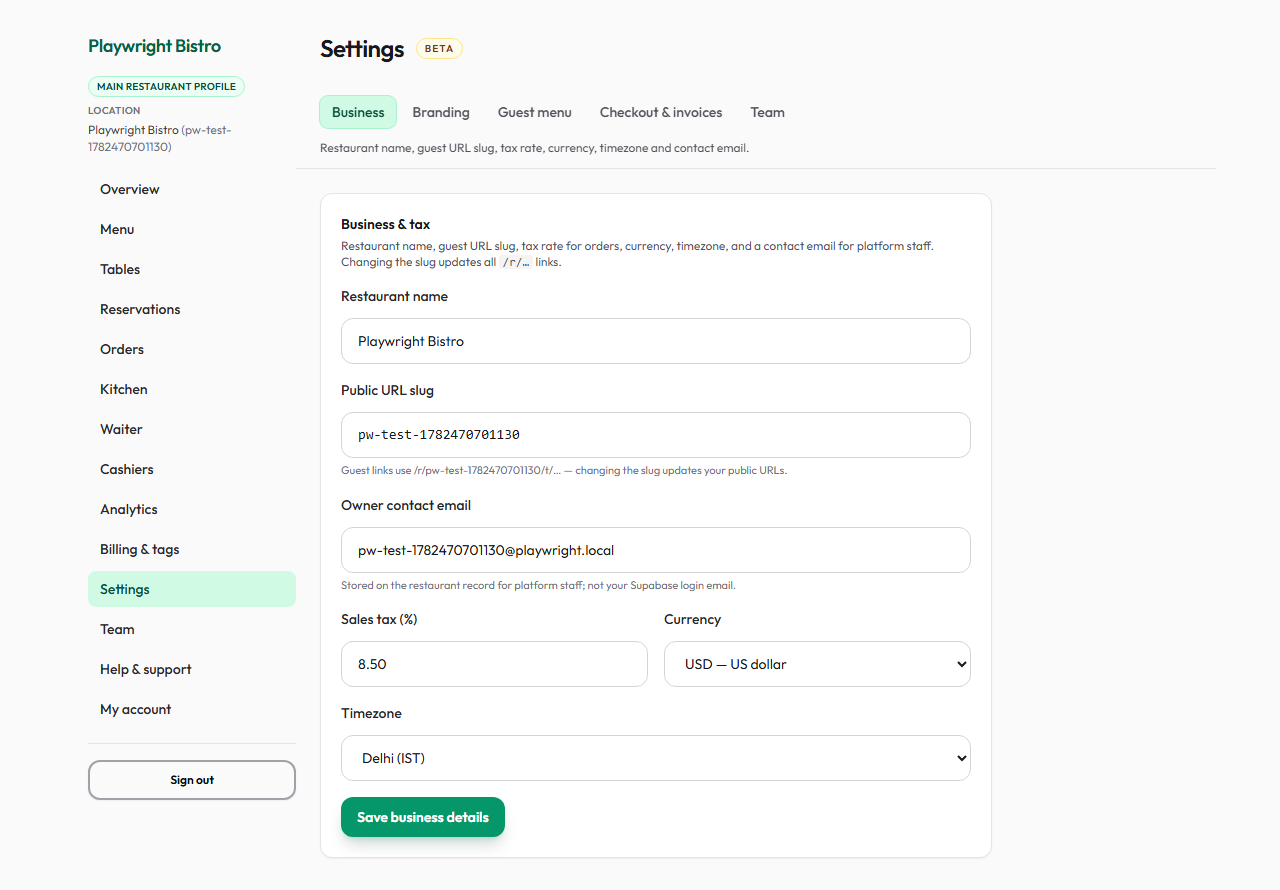
Settings
Branding and guest-facing policies — how your menu looks, invoice rules, reservation options, and entry mode (QR vs TapKey).
- Choose guest menu layout and colour theme.
- Set invoice and receipt policies for your venue.
- Configure reservations, physical access, and guest entry mode.
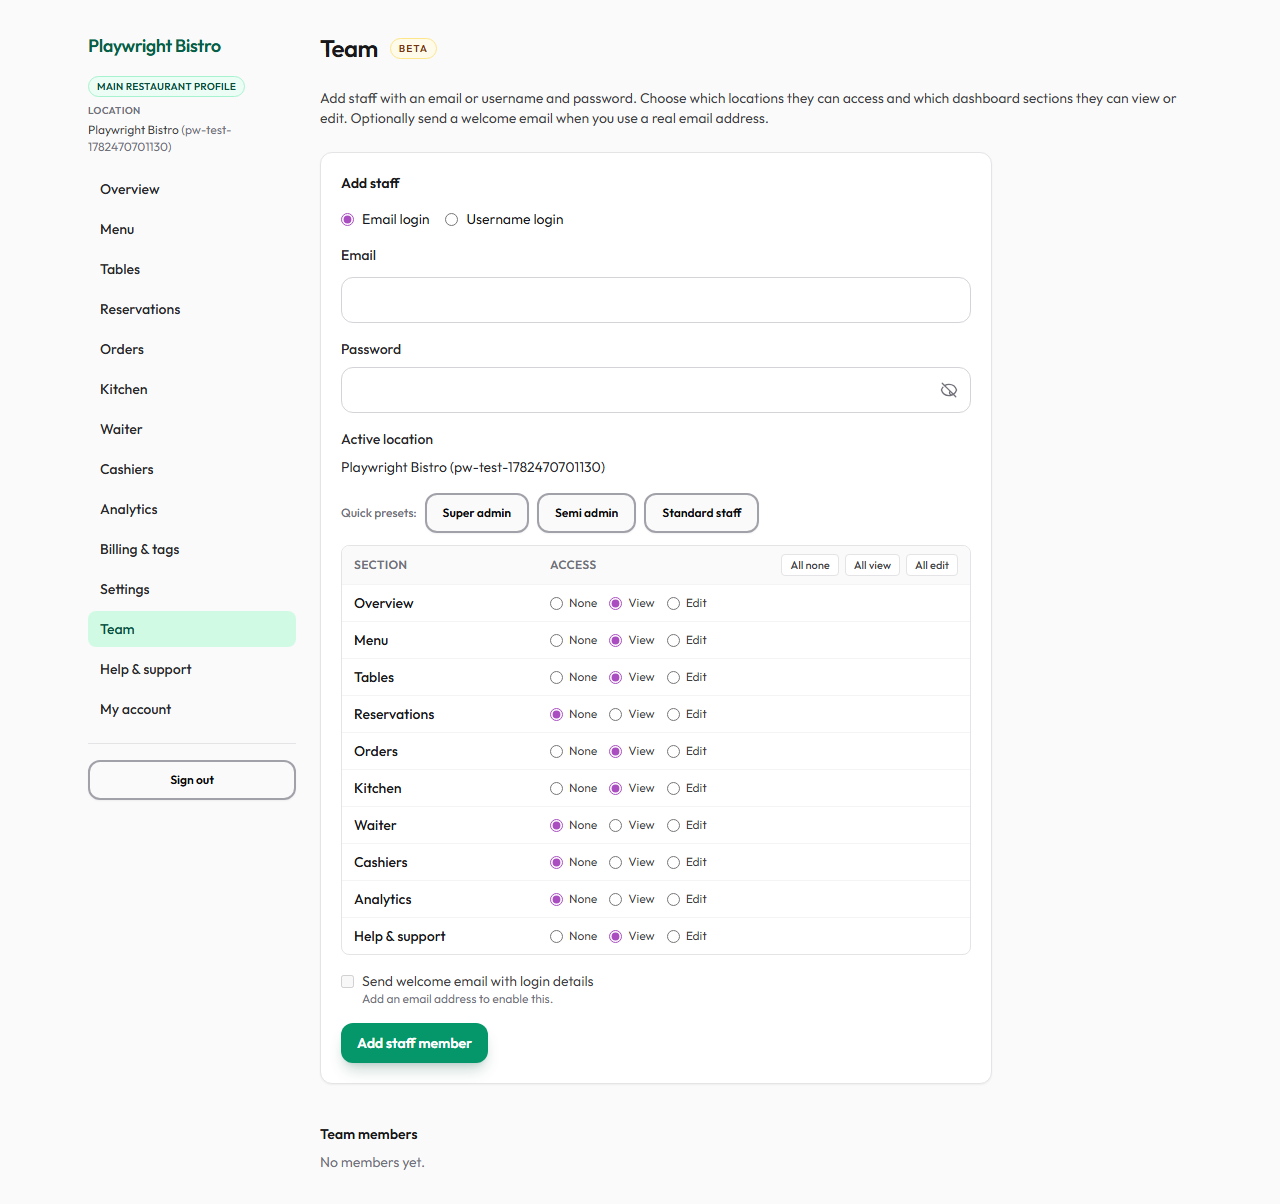
Team
Invite staff with their own login. You control which parts of the dashboard each person can see or edit.
- Add a team member with a username and optional email.
- Choose a permission preset or set each section (Menu, Orders, Kitchen, etc.) to view or edit.
- Staff sign in with their username — they only see the tabs you allowed.
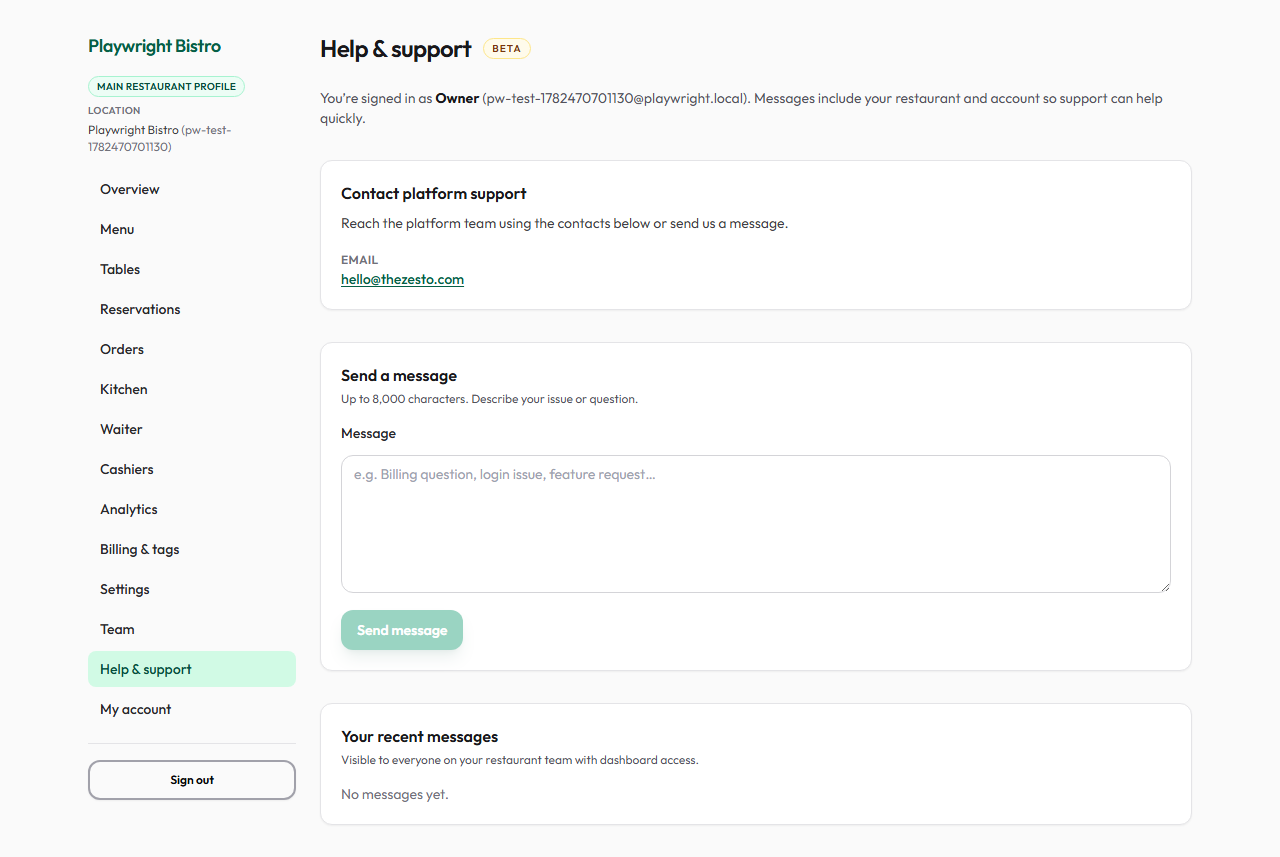
Help & support
Contact The Zesto platform team from inside your account. Messages are tied to your restaurant so support knows who you are.
- Read platform contact details (email, hours, phone).
- Send a message describing your question or issue.
- Check Your recent messages for replies and status updates.
Open Help & support in dashboard →
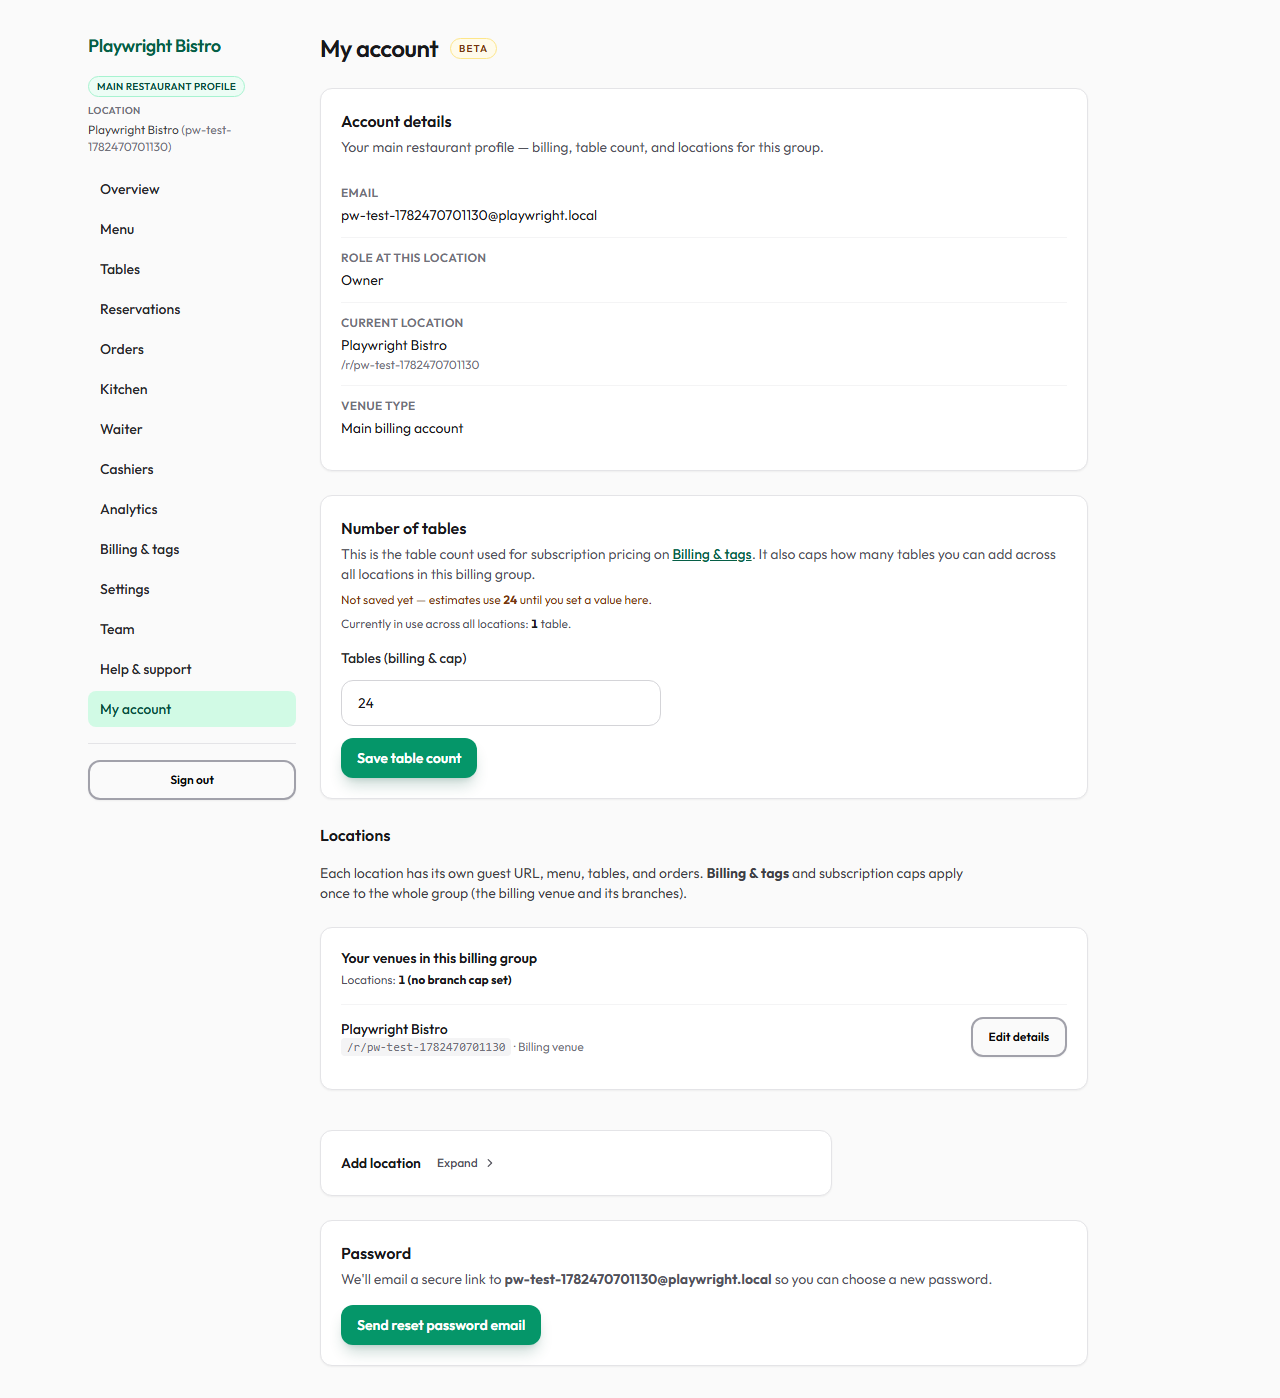
My account
Your profile and, if you run multiple venues, your branch locations under one billing account.
- Review account details tied to your login.
- Add or switch locations (branches) from the Locations section.
- Adjust table-count limits and billing-group settings when on a multi-branch plan.
Open My account in dashboard →